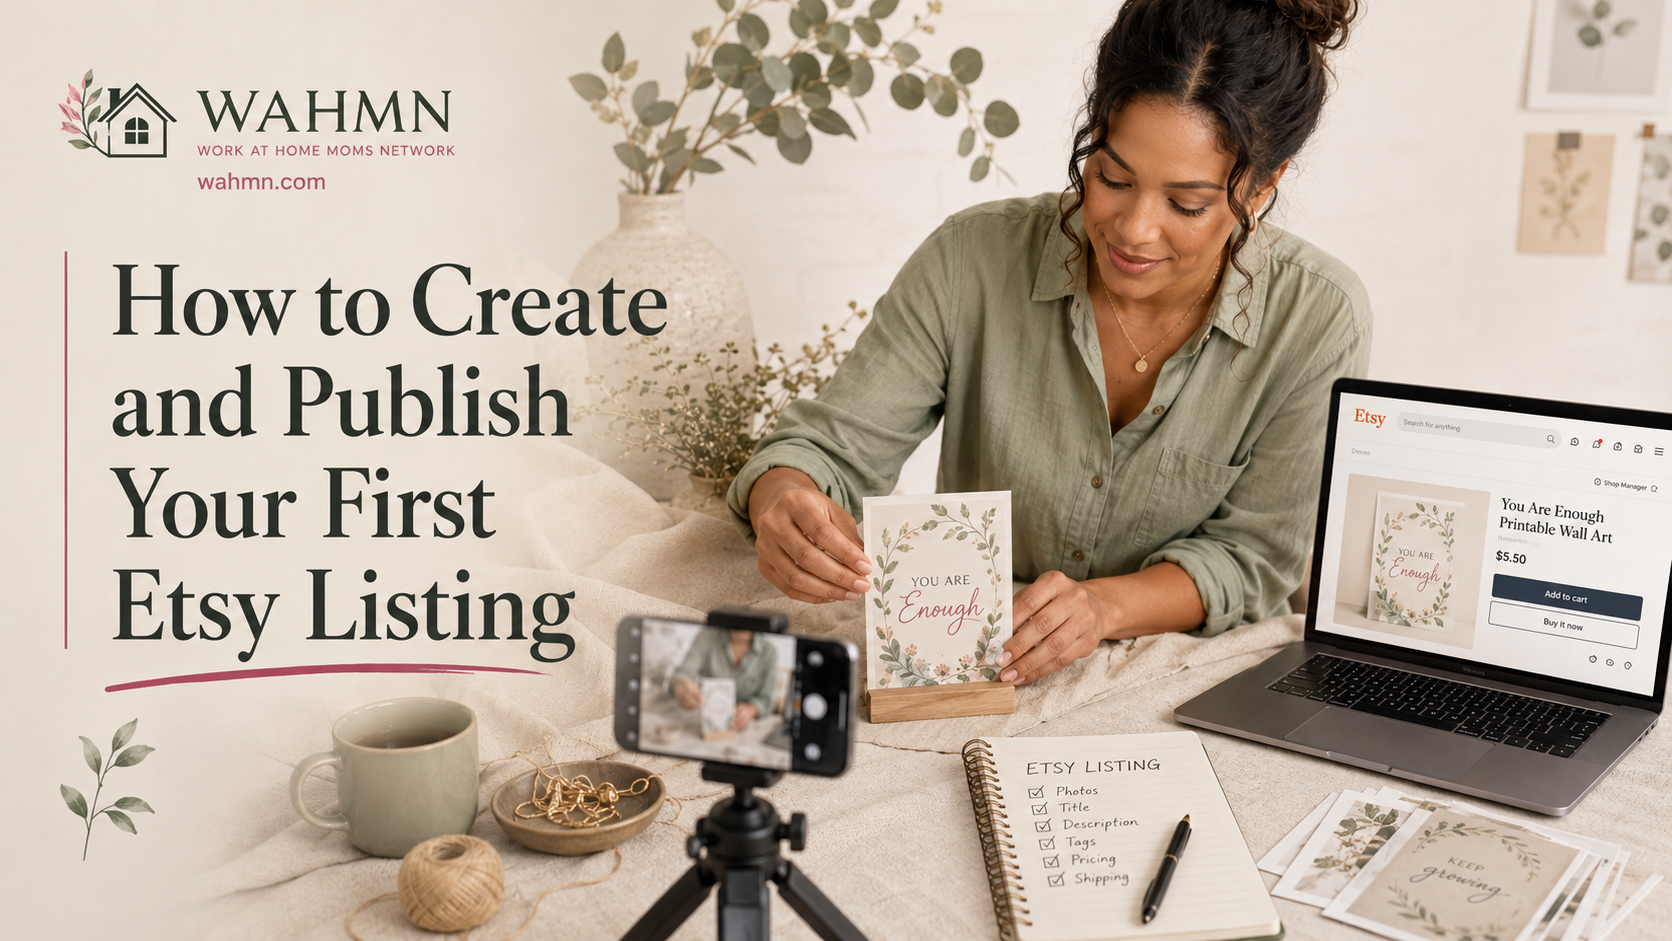
How to Create and Publish Your First Etsy Listing
In this article
- Table of Contents
- How to Create an Etsy Listing: What This Guide Covers
- What You Need Before You Start
- Step 1: Confirm That Your Product Can Be Sold on Etsy
- Step 2: Build a Listing Preparation Folder
- Step 3: Calculate Your Price and Etsy Fees
- Step 4: Take Your Product Photos and Videos
- Step 5: Open the Etsy Listing Form
- Step 6: Choose the Category and Item Type
- Step 7: Write a Clear Title and Useful Description
- Step 8: Add Attributes, Tags, Variations, and Personalization
- Step 9: Enter the Price, Quantity, SKU, and Digital Files
Learning how to create an Etsy listing is not difficult, but the listing form asks for more than a product name and a price. Your photos, title, description, tags, processing time, policies, and product details all work together to tell a buyer exactly what she will receive.
At WAHMN, we do not want you to publish a listing simply because every required box is filled in. We want you to create a product page that is accurate, easy to understand, priced to make sense for your business, and ready for a real buyer to use without sending you five questions first.
This guide walks you through one complete listing from preparation to publication. The main directions use Etsy.com on a desktop computer because the larger screen makes it easier to review every field, but we have included the app path where it matters. Etsy changes labels and layouts from time to time, so we have also linked to the current official Etsy instructions throughout the article.
Last verified: August 21, 2026. Etsy’s current listing form has seven main tabs, allows up to 20 photos and two videos, and may take up to 48 hours to place a new listing in search results and categories.
Table of Contents
- What this guide covers
- What you need before you start
- Step 1: Confirm that your product can be sold on Etsy
- Step 2: Build a listing preparation folder
- Step 3: Calculate your price and Etsy fees
- Step 4: Take your product photos and videos
- Step 5: Open the Etsy listing form
- Step 6: Choose the category and item type
- Step 7: Write a clear title and useful description
- Step 8: Add attributes, tags, variations, and personalization
- Step 9: Enter the price, quantity, SKU, and digital files
- Step 10: Set shipping, processing, returns, and disclosures
- Step 11: Preview and publish your first Etsy listing
- What to do after the listing is live
- Common Etsy listing mistakes
- Final Etsy listing quality checklist
- Frequently asked questions
- Official Etsy sources used for this guide
How to Create an Etsy Listing: What This Guide Covers
This article assumes that you have created an Etsy seller account and can enter Shop Manager. If you are opening a brand-new shop, Etsy will also ask you to choose a shop name, enroll in Etsy Payments, provide billing information, complete identity or security checks, and pay any setup fee shown during onboarding.
The goal here is narrower. We will show you how to create an Etsy listing without turning the page into a keyword-filled sales pitch. By the end of this guide, you will have one complete physical or digital product listing that you can save as a draft, preview, or publish.
You will prepare and enter:
- Product photos and optional video
- The most accurate Etsy category
- A buyer-friendly title
- A detailed description
- Relevant attributes and 13 search tags
- Variations or personalization, when needed
- Price, quantity, and an optional SKU
- Shipping and processing details for a physical item
- Downloadable files for a digital item
- Return and exchange settings
- Production partner or artificial intelligence disclosures, when required
- Renewal and shop-section settings
Physical and digital listings are not identical
Most of the process is the same, but several fields work differently.
| Listing detail | Physical product | Digital product |
|---|---|---|
| Delivery | Shipped to the buyer | Downloaded or delivered digitally |
| Processing profile | Required | Not used for an instant download |
| Shipping profile | Required | Not used |
| Variations | Available for up to two item attributes | Not currently supported |
| Digital files | Not applicable | Up to five files, 20 MB each |
| Return policy | Must be set, even if you do not accept returns | Digital purchases are generally shown as nonreturnable and noncancelable, subject to applicable law |
| Package weight and size | Needed for calculated shipping | Not applicable |
When a direction applies only to one type, we will label it Physical item or Digital item.
What You Need Before You Start
You do not need a paid keyword tool, an expensive camera, or professional studio equipment to create your first listing. You do need complete product information and a few basic tools that help you describe the item accurately.
| Tool or information | Required? | What it is used for |
| Etsy seller account | Yes | Accessing Shop Manager and publishing |
| Phone camera or camera | Yes | Creating original listing photos |
| Window light or another steady light source | Strongly recommended | Producing clear, accurate photos |
| Plain background or simple styled setting | Strongly recommended | Keeping the product easy to see |
| Ruler or measuring tape | Usually | Recording accurate dimensions |
| Postal scale | Physical items | Weighing the packed order for shipping |
| Shipping box or mailer | Physical items | Measuring the actual packed size |
| Spreadsheet or calculator | Strongly recommended | Calculating price, costs, and fees |
| Image editor | Optional | Cropping, exposure correction, and resizing |
| File-opening software | Digital items | Testing every file the buyer will receive |
| Written return policy | Physical items | Completing the required policy field |
At WAHMN, our rule is simple: do not make the listing form the place where you invent your product details. Gather the facts first, then use the form to enter information you have already checked.
Step 1: Confirm That Your Product Can Be Sold on Etsy
The first decision in how to create an Etsy listing is whether the product qualifies for the marketplace. Before you spend time on photography and search terms, make sure the item fits Etsy’s current Creativity Standards and Seller Policy. Etsy says items must be made, designed, handpicked, or sourced by the seller under its permitted categories.
Etsy’s four broad product paths
Your item generally needs to fit one of these descriptions:
- Made by you: You physically make, assemble, alter, or produce the item, including work made with tools such as a Cricut, CNC machine, or 3D printer.
- Designed by you: You created the original design. You may deliver it as a digital file or use a disclosed production partner to produce a physical product.
- Handpicked by you: This includes qualifying vintage items, natural items, and certain curated collections. Etsy currently requires vintage items to be at least 20 years old.
- Sourced by you: This includes qualifying craft supplies, party supplies, and certain items that help a buyer create or personalize something.
Mass-produced reselling is not allowed simply because an item looks handmade. Dropshipping is also prohibited except within Etsy’s specific permitted circumstances, such as an original design fulfilled by a disclosed production partner.
Check your rights before using names, images, or characters
Owning a cutting machine, printer, template, font, clip art file, or design subscription does not automatically give you the right to sell every design you can make with it. Read the commercial license for every outside asset and avoid using another company’s trademark, character, logo, song lyric, photograph, or artwork without the necessary rights.
Adding words such as “inspired by,” “style,” or “unofficial” does not guarantee that a listing is lawful or protected from an intellectual property report. Etsy may remove material after receiving a qualifying infringement notice, and the seller remains responsible for what she lists.
Use this pre-listing rights check:
- Do I own the design, or do I have a clear commercial license?
- Does the license allow use on products for sale?
- Does it allow print-on-demand or production-partner use?
- Am I using a brand name, sports team, celebrity, character, book title, or logo?
- Did I create or legally license every photograph, mockup, font, and graphic?
- Can I save proof of the license and purchase in my business records?
Disclose production partners and artificial intelligence
A production partner is a company or person outside your shop who physically helps produce an item you designed. Etsy requires you to disclose that partner in the applicable listing and provide accurate information about your role.
Etsy also requires a listing disclosure when an item was created through the use of artificial intelligence. A seller-prompted AI creation may qualify as designed by the seller, but the use of AI must be disclosed in the relevant listing description.
A simple disclosure might read:
This artwork was created from original concepts and prompts developed by our shop, with the final image produced using an artificial intelligence image tool and then edited by us.
Do not use that wording unless it accurately describes your process. Transparency is more useful than a vague statement that hides what you actually created.
Use original listing photos
For made-by-seller items, Etsy generally requires your own photographs or video, not another seller’s photo, a stock image, or an image copied from a supplier. Etsy provides limited exceptions for certain custom products and items made with production-partner assistance, so review the current image rules if your buyer’s finished product does not exist until after purchase.
Stop here if you are unsure. A listing fee is not refundable just because Etsy removes a listing. It is better to verify the product, license, and disclosure rules before you publish.
Step 2: Build a Listing Preparation Folder
Create one folder on your computer for this product. A clean folder prevents you from uploading the wrong image, attaching an old digital file, or forgetting which description is final.
Use a simple structure like this:
01-Photos02-Video03-Listing-Copy04-Digital-Files05-Shipping06-Licenses-and-Receipts
Inside 03-Listing-Copy, create a document or spreadsheet with the following fields.
| Product information | What to record |
| Plain product name | What the item is, without marketing language |
| Main materials | The materials a buyer would reasonably expect to know |
| Measurements | Height, width, depth, capacity, weight, or file dimensions |
| Colors | Accurate names, plus a note about screen differences when relevant |
| What is included | Every item, file, page, or accessory included in the purchase |
| What is not included | Props, frames, stands, hardware, or physical products not included |
| Production method | Handmade, digitally designed, vintage, sourced, or production partner |
| Variations | Sizes, colors, finishes, bundles, or other options |
| Personalization | Exactly what the buyer may request and any limits |
| Care instructions | Washing, cleaning, storage, or usage guidance |
| Processing time | Time you need before handing a physical order to the carrier |
| Package details | Packed weight, length, width, and height |
| Price inputs | Materials, labor, packaging, overhead, shipping, fees, and profit |
| Return approach | Returns, exchanges, conditions, and buyer-paid return shipping |
| Search phrases | Phrases a buyer might use for this exact item |
| Required disclosures | Production partner, AI use, safety, or other relevant details |
Prepare physical products before photographing them
Finish the actual item when possible. Clean it, remove dust and fingerprints, trim loose threads, test moving parts, and confirm that the finished item matches the dimensions you plan to list.
Then pack one sample order as you expect to ship it. Weigh and measure the packed parcel, not the unpacked product. Calculated shipping based on a bare product can leave you paying the difference when the box, padding, and inserts increase the final weight.
Prepare digital files as a buyer would receive them
Etsy currently allows up to five files for an instant digital listing, with a maximum size of 20 MB per file. The buyer sees the filenames you upload, and Etsy does not provide a way to rename those files after upload without removing and uploading them again.
Before opening the listing form:
- Give every file a clear, professional name.
- Open every file on a second device when possible.
- Test all clickable links.
- Confirm the page size, image size, or file dimensions.
- Check that fonts display or are properly included.
- Extract every ZIP file to make sure it is not corrupt.
- Remove drafts, hidden notes, personal information, and editable source files that are not part of the purchase.
- Create a short instructions PDF when the buyer needs software, an account, or special printing steps.
Example filenames are more helpful than final2-revised-USETHIS.pdf:
Weekly-Meal-Planner-US-Letter.pdfWeekly-Meal-Planner-A4.pdfPrinting-Instructions.pdfEditable-Template-Access.pdf
Step 3: Calculate Your Price and Etsy Fees
Understanding fees is part of learning how to create an Etsy listing that can support a real business. Do not choose a price only by looking at the first page of Etsy search. Another seller may use different materials, pay herself nothing for labor, charge shipping separately, sell at a temporary discount, or accept a margin that would not work for your business.
Your price needs to cover the actual cost of fulfilling the order and leave room for profit.
Current Etsy fees to understand
The figures below were verified from Etsy’s official fee pages on August 21, 2026.
| Fee | Current basic rule |
| New-shop setup fee | A one-time, nonrefundable amount may be charged during onboarding. Etsy says the amount varies by location and is shown before you finish setup. |
| Listing fee | $0.20 USD when you publish or renew a listing, whether or not it sells |
| Listing period | A listing expires after four months unless it sells or renews |
| Transaction fee | 6.5% of the order amount, including item price, shipping, and gift wrap |
| U.S. Etsy Payments fee | 3% of the total sale amount plus $0.25 per order |
| Currency conversion | 2.5% when Etsy must convert between the listing and payment-account currencies |
| Offsite Ads | 15% on an attributed order for shops below the threshold that participate; 12% once a shop has reached $10,000 in Etsy sales during a qualifying 365-day period |
| Optional Etsy Ads | Cost-per-click advertising controlled through a daily budget |
Payment processing rates vary by the location of your bank account. The 3% plus $0.25 example applies to a U.S. bank account, so sellers elsewhere should use Etsy’s current country-by-country processing fee table.
Offsite Ads are not charged merely because you publish. The fee applies when Etsy attributes an order to an offsite ad. Shops that have always remained below $10,000 in Etsy sales during a consecutive 365-day period can opt out. Once a shop reaches that threshold, participation becomes required for the lifetime of the shop at the 12% rate under Etsy’s current policy.
A basic U.S. fee example
Suppose you sell a physical item for $30 and charge $5 for shipping. This example excludes sales tax, optional ads, currency conversion, shipping-label cost, refunds, and any other country-specific fees.
| Calculation | Amount |
| Item price | $30.00 |
| Shipping charged to buyer | $5.00 |
| Order total used in this example | $35.00 |
| Listing fee | $0.20 |
| Transaction fee, 6.5% of $35 | $2.28 |
| U.S. payment processing, 3% of $35 plus $0.25 | $1.30 |
| Baseline Etsy fees | $3.78 |
| Amount left before product, packaging, postage, labor, overhead, and taxes | $31.22 |
If the same $35 order were attributed to a 15% Offsite Ad, the advertising fee would add $5.25. That is why a price that barely works under baseline fees may fail when an advertising fee applies.
Use a real pricing worksheet
Start with these costs:
- Materials used in one finished item
- Packaging, inserts, labels, and protective materials
- Labor time multiplied by a reasonable hourly rate
- Production-partner or print-on-demand charge
- Shipping cost you absorb instead of charging separately
- Allocated overhead, such as software, equipment, workspace, and test products
- A realistic allowance for Etsy fees
- A realistic allowance for defects, replacements, or waste
- Your desired profit
A simple planning formula is:
Direct costs + labor + allocated overhead + fee allowance + target profit = minimum sustainable price
This is a planning formula, not a tax formula. Because percentage fees depend on the final order amount, use a spreadsheet or fee calculator to work backward and confirm that the final price still leaves the profit you intended.
If you are still deciding what to sell, how to price it, or whether the business can support your income goal, the WAHMN Business Planner and WAHMN Business Launcher are designed to help you work through those decisions before you spend heavily on inventory.
Step 4: Take Your Product Photos and Videos
A buyer cannot pick up your product, turn it over, feel the material, or compare its size to something familiar. Your images have to do that work.
Etsy’s current listing form allows up to 20 photos and two short videos. You do not need 20 nearly identical photos. For a first listing, eight to ten useful images often tell a stronger story than a full set of repetitive angles.
A practical product-photo shot list
Choose the shots that fit your item:
- Main thumbnail: A clean, accurate view that makes the product easy to identify.
- Second angle: The side, back, open, closed, folded, or alternate view.
- Close detail: Texture, stitching, grain, finish, clasp, print quality, or another feature.
- Scale image: The item in a hand, beside a ruler, on a model, or in its intended setting.
- Dimensions graphic: A simple diagram or photo with key measurements.
- What is included: Every piece laid out together.
- Variation image: Colors, sizes, finishes, or styles labeled clearly.
- Use image: The product being used in a normal setting.
- Packaging image: What the buyer receives when presentation is part of the value.
- Imperfection image: Honest close-ups for vintage, handmade, or one-of-a-kind flaws.
The first image should show the exact item clearly. Avoid covering the product with large text, badges, decorative props, or a logo so dominant that the buyer cannot immediately see what is for sale.
How to take Etsy listing photos with a phone
- Clean the camera lens. A fingerprint can make every image look soft even when the phone says it is in focus.
- Use steady indirect light. Place the product near a window, but avoid a hard beam of direct sunlight that creates blown highlights and deep shadows.
- Turn off mixed lighting. Window light plus a yellow ceiling bulb can create colors that are difficult to correct.
- Use a simple background. White foam board, paper, fabric, wood, or a real setting can work when it supports the product instead of competing with it.
- Stabilize the phone. Use a small tripod or rest the phone on a stable surface.
- Tap the product to focus. Adjust exposure so light products keep their detail and dark products do not disappear.
- Photograph farther back than the final crop. Etsy uses different thumbnail shapes, so leave space around the product.
- Keep the main subject near the center. This reduces the chance that an important part is cut off in search thumbnails.
- Take more than one version of every important shot. Small changes in angle and focus can make a large difference.
- Compare the photo with the real product. Correct exposure and white balance, but do not edit the color or condition so heavily that the buyer receives something different.
Etsy recommends listing images with a width and height of at least 2,000 pixels. Its current image guidance also recommends a horizontal or square first photo with the focal point centered so the product survives different thumbnail crops.
Supported shop image formats currently include JPG, GIF, PNG, SVG, and HEIC, although animated GIFs and transparent PNG behavior is limited. For ordinary product photography, a high-quality JPG in the sRGB color profile is a practical choice.
Add useful alt text
Alt text helps a shopper using a screen reader understand the image. Etsy also says accurate alt text can help search engines understand what appears in the photo.
Describe what is actually visible:
- Weak: mug
- Better: Speckled beige ceramic coffee mug with curved handle on a wood table
- Weak: planner
- Better: Printable weekly meal planner page with breakfast, lunch, dinner, and grocery sections
Do not paste a string of tags into every image. Alt text should describe the image, not act as a hidden keyword list.
Add a short product video when it helps
Etsy currently permits up to two videos per listing. Keeping each video between 5 and 15 seconds fits the range shown in the current listing form. Etsy removes the audio after upload, so the visual should make sense without sound.
Useful video ideas include:
- Turning the item slowly to show all sides
- Opening a clasp, drawer, lid, or moving part
- Showing fabric drape or jewelry movement
- Demonstrating scale in a hand
- Paging through a planner or workbook
- Showing how personalization appears
- Recording a short part of the making process
Avoid using the video as a fast advertisement filled with tiny text. A simple, steady product demonstration is more useful.
Special image notes for digital products
Make it obvious that the buyer receives a digital file, not the frame, tablet, printer, paper, or decorative props in the mockup. Include at least one image that shows the actual pages, designs, file ratios, or template screens included.
Consider adding a clearly designed information image that states:
- Digital download
- No physical product will be shipped
- File types included
- Page size or image dimensions
- Software or account required
- Whether the file is editable
- Personal-use or commercial-use terms
Use mockups and design assets only when you created them or have the right license. Keep proof of those rights with your business records.
Step 5: Open the Etsy Listing Form
The next part of how to create an Etsy listing happens inside Shop Manager. On Etsy.com, use this path:
- Sign in to Etsy.
- Select Shop Manager.
- Select Listings.
- Select Add a listing.
- Complete the listing form.
- Choose Save as Draft or Publish when you are ready.
In the Etsy Seller app, go to Listings, select the plus sign in the top-right corner, and choose either Start from scratch or Copy an existing listing.
Etsy’s current desktop form organizes the information into seven tabs:
- Photo and video
- Category
- Item details
- Item options
- Pricing and shipping
- How it is made
- Settings
The form may prefill some choices based on your photos or earlier shop settings. Treat those as suggestions, not confirmed facts. Review every prefilled category, processing profile, shipping profile, and policy before publishing.
Screenshot suggestion: Add a current screenshot showing
Shop Manager > Listings > Add a listing. Crop out personal, banking, order, and customer information before placing it in the article.
Save the listing as a draft whenever you need to verify a fact. There is no benefit in publishing a guessed material, size, processing time, or policy simply to finish the screen.
Step 6: Choose the Category and Item Type
The category tells Etsy where your item belongs and determines many of the attributes and variation options you will see later. Choose the most specific accurate category available, not a broad category that seems to have more traffic.
For example, a handmade stoneware coffee mug should not stop at a broad home category when Etsy offers a more specific mug or drinkware path. The more accurate choice gives Etsy and the shopper clearer information about what the item is.
Review these category details
- Category: The closest accurate match for the product
- Physical or digital: How the buyer receives the item
- When it was made: The accurate production or vintage period
- Who made it: You, a shop member, or another disclosed party
- What it is: A finished product or a supply, when Etsy asks
- Production method: The honest method used to create or source it
If the item is vintage, confirm that it meets Etsy’s current requirement of being at least 20 years old. “Vintage style” does not make a newer item eligible for the vintage category.
Do not choose a digital listing just to avoid shipping fields
A digital listing must deliver a qualifying digital item. It is not a workaround for collecting a deposit, selling an unapproved service, directing someone to another checkout, or avoiding physical-item requirements.
For a custom digital product, choose the appropriate made-to-order digital path and describe what the buyer will receive, how she submits information, and how delivery will work.
Step 7: Write a Clear Title and Useful Description
Many guides on how to create an Etsy listing make the title sound more complicated than it is. Your title helps a shopper identify the item quickly, while your description closes the information gap that photos cannot fill.
How to write the Etsy listing title
Etsy currently allows up to 140 characters, but its updated guidance recommends considering fewer than 15 words. Etsy also recommends stating the product clearly, putting the most important objective traits near the beginning, avoiding repeated words, and moving subjective claims such as “perfect” or “beautiful” into the description.
Use this formula as a starting point:
Clear product noun + most important material, color, size, style, or function
Examples:
- Handmade Speckled Ceramic Mug, 12 oz Stoneware Coffee Cup
- Editable Weekly Meal Planner, Printable PDF and Canva Template
- Vintage 1980s Brass Candlesticks, Pair of 8-Inch Taper Holders
- Personalized Walnut Recipe Box, Engraved 4×6 Card Storage
- Linen Cross-Back Apron, Natural Beige, Adjustable Adult Size
A buyer should not have to decode the title.
Hard-to-read title:
Coffee Mug Gift for Her Best Friend Gift Handmade Mug Pottery Mug Cute Mug Birthday Gift
Clearer title:
Handmade Speckled Ceramic Mug, 12 oz Stoneware Coffee Cup
The second title still gives Etsy useful product information, but it reads like a product name instead of a pile of search phrases.
Write the first sentence for clarity
Etsy recommends clearly identifying the item in the first sentence of the description. That is also good customer service because mobile shoppers may see only the opening lines before expanding the full text.
A useful opening sentence might be:
This handmade speckled stoneware mug holds approximately 12 ounces and is individually wheel-thrown, glazed, and fired in our studio.
That sentence answers four immediate questions: what it is, its capacity, how it was made, and why small differences may exist.
Use a buyer-centered description structure
After the opening, organize the details so a shopper can scan them.
1. What the buyer receives
List the exact contents:
- One handmade ceramic mug
- Approximate 12-ounce capacity
- Gift box, if included
- Care card, if included
State what is not included when your photos contain props.
2. Size and measurements
Give the actual dimensions and note reasonable handmade variation when appropriate.
- Height
- Width or diameter
- Capacity
- Chain or strap length
- Page size
- Image dimensions
- File ratio
- Weight
Do not rely only on words such as small, large, or oversized. Those words mean different things to different buyers.
3. Materials and construction
Identify the main materials honestly. This can include the clay body, metal, fabric fiber, wood species, paper weight, finish, ink, hardware, or digital file type.
Avoid unsupported safety, health, environmental, or performance claims. “Food safe,” “non-toxic,” “organic,” “hypoallergenic,” and similar claims should be accurate, supportable, and allowed under the rules that apply to the product.
4. Options and personalization
Explain:
- Which choices the buyer must make
- Where the personalization will appear
- Character limits
- Capitalization or font choices
- Whether you send a proof
- What happens if the buyer leaves the field blank
- Whether processing time changes for custom work
5. Processing and delivery
For a physical product, state the time you need to prepare the order before the carrier receives it. Do not describe processing time as the complete delivery time.
For a digital item, explain whether the files are available immediately or created after purchase. Include the software, account, or skill needed to use them.
6. Care, use, and limitations
Tell the buyer how to use or care for the item and what it does not include. For example:
- Hand wash only
- Indoor use
- Decorative item, not a toy
- Colors may vary slightly by screen
- Printer and paper are not included
- Canva account required
- Not an editable source file
- Personal use only
7. Returns and contact
Keep the wording consistent with the return policy selected in the listing. A description cannot override the platform policy, consumer law, or a promise made elsewhere in the shop.
A reusable physical-product description template
What it is
This [product name] is [short, factual description of material, size, and primary use].What you will receive
- [Quantity and exact item]
- [Included accessory or packaging]
- [Anything else included]
Size
- Height: [measurement]
- Width: [measurement]
- Capacity or weight: [measurement]
Materials
- [Material 1]
- [Material 2]
- [Finish or hardware]
Options
Choose [size/color/finish] from the menu. [Explain any important difference in price, appearance, or processing time.]Personalization
Enter [exact information] in the personalization box. Please check spelling and capitalization before ordering. [Explain proof process or what happens if information is incomplete.]Processing and shipping
This item is [ready to ship/made to order]. We need [time] to prepare it before handing it to the carrier. The estimated delivery shown by Etsy includes both processing and transit information.Care
[Care and safe-use directions.]Please note
[Natural variation, screen-color note, props not included, or another material limitation.]Returns
Please review the return and exchange policy shown on this listing before ordering. Contact us through Etsy Messages if you have a question about the item.
A reusable digital-product description template
Digital product only
This listing includes [clear product name and purpose]. No physical item will be mailed.Files included
- [Filename or file type, size, and page count]
- [Filename or file type, size, and page count]
- [Instructions or access PDF]
How delivery works
[Explain instant download or made-to-order delivery.]What you need
[Software, account, printer, device, or basic skill required.]How to use it
- [Download or open the access file.]
- [Open the file in the required program.]
- [Edit, print, or use it.]
License
[State accurate personal-use or commercial-use terms.]Important limitations
[Not editable, fonts not included, colors vary, no physical product, or other important facts.]Returns
Digital purchases are generally shown by Etsy as nonreturnable and noncancelable. Contact us through Etsy Messages if a file is missing, damaged, or materially different from the listing.
Do not copy a template blindly. Remove sections that do not apply and add product-specific information a real buyer needs.
Step 8: Add Attributes, Tags, Variations, and Personalization
Learning how to create an Etsy listing does not mean forcing keywords into every field. This section helps Etsy understand the item and gives the buyer the choices needed to place the correct order.
Complete the relevant attributes
Attributes change by category and may include:
- Primary and secondary color
- Material
- Size or dimensions
- Room
- Style
- Occasion
- Holiday
- Recipient
- Sustainability or production details
Use only accurate attributes. Etsy says attributes can also help a listing match shopper searches, so leaving a relevant field blank can remove useful information.
You do not need to repeat a basic attribute word in several tags simply because it seems important. A specialized phrase can still be useful. For example, you may select green as an attribute and use “mint green planner” as a tag because the more specific color phrase carries additional meaning.
How to choose all 13 Etsy tags
Etsy allows up to 13 tags and recommends using natural, multiword phrases with variety. A practical tag process is:
- Write the plain name of the item.
- Write the material, style, size, use, and defining feature.
- Think about who buys it and why, but use recipient or occasion phrases only when they fit the item.
- Type the product into Etsy’s search bar and note relevant suggestions.
- Review the language buyers and sellers use, but do not copy protected brand terms.
- Remove phrases that describe a different product.
- Avoid creating 13 tiny variations of the same phrase.
- Use all available tags when you have 13 genuinely relevant phrases.
For the ceramic mug example, a possible set might be:
- ceramic coffee mug
- speckled mug
- handmade pottery
- wheel thrown mug
- stoneware cup
- 12 oz coffee mug
- neutral kitchen
- rustic coffee cup
- pottery tea cup
- handmade coffee cup
- coffee lover gift
- housewarming mug
- artisan drinkware
These are examples, not a universal tag list. A porcelain mug with a printed illustration, a personalized tumbler, and a vintage teacup need different tags.
Avoid these tag mistakes
- Using tags that do not describe the product
- Repeating the same two words in nearly every tag
- Adding a popular holiday that has no real connection to the item
- Using a competitor’s shop name
- Using brand, celebrity, team, character, or franchise terms without rights
- Splitting one useful phrase into several weak single-word tags
- Treating a paid keyword score as proof that the phrase will sell your item
You do not need paid Etsy SEO software to publish your first listing. Etsy search suggestions, accurate product language, and later data from Shop Stats can give you a sound starting point.
Add variations carefully
Etsy currently supports variations for up to two item attributes on qualifying physical listings. Depending on the category, you may offer options such as size, color, finish, scent, or quantity. Once several variations are selling, stock becomes the problem, and building an inventory tracker with AI keeps it straight.
For each variation, confirm:
- The displayed option name is easy to understand
- The correct price is attached
- The correct quantity is attached
- The correct SKU is attached
- The correct processing profile is attached, when applicable
- The correct photo is linked for visible options such as color
The price entered for a variation is the total price of that version, not an added surcharge. If a small item costs $20 and a large item costs $28, enter $20 and $28, not $20 and $8.
Digital listings do not currently support variations. When you need to sell different digital sizes, licenses, or bundles, you may need separate listings or one clearly defined bundle that includes all stated files.
Set personalization instructions that prevent errors
Do not write only “Enter personalization here.” Tell the buyer exactly what to provide.
A stronger instruction is:
Enter the name exactly as it should appear, up to 12 characters. Include capitalization. Do not enter a date. We will engrave the text exactly as submitted.
When the order requires a photo, logo, or artwork file, use Etsy’s available custom-option tools when appropriate and explain accepted file quality, orientation, and content. Never direct the buyer to send payment outside Etsy.
Step 9: Enter the Price, Quantity, SKU, and Digital Files
Etsy’s pricing and inventory fields control what the buyer can purchase. Slow down here, especially when variations change the price or available quantity.
Enter the final price
Use the price you confirmed in your worksheet. If your shop currency differs from your payment-account currency, review Etsy’s currency conversion rules before publishing because conversion can add a fee.
Check that:
- The base price is not an unfinished placeholder
- Every variation shows the intended total price
- Shipping is included or charged separately as planned
- Personalization charges are handled through the available Etsy options
- Your margin still works after baseline and possible advertising fees
Set a realistic quantity
For ready-to-ship goods, enter the number you actually have available. For made-to-order goods, do not enter a very large quantity unless you can fulfill that volume within the stated processing time.
If several quantities sell from one listing, Etsy may charge a new $0.20 listing fee as the listing renews for additional units. Build that small renewal cost into your pricing rather than treating the first $0.20 as the only listing fee the product will ever incur.
Create an internal SKU
A stock keeping unit is optional, but it becomes useful quickly. A SKU helps you connect the Etsy order with your materials, storage bin, production file, or shipping process.
Use a format you can understand later:
MUG-SPK-12OZ-BEIPLN-MEAL-USLTR-01BOX-WAL-4X6-PERS
Do not put customer-facing claims in the SKU. It is an internal identifier.
Upload and test digital files
For an instant digital item, upload the final files in the digital-files section. Etsy currently permits up to five files, with a maximum size of 20 MB each, and the filenames are visible to the buyer.
Before publishing, complete this test:
-
Every file opens without an error.
-
Every page is present and in the correct order.
-
Clickable links open the intended page.
-
Editable fields work as described.
-
Fonts and graphics display correctly.
-
ZIP files extract successfully.
-
File sizes remain within Etsy’s limit.
-
Filenames are clear and professional.
-
The listing images match the delivered product.
-
The description states required software and account access.
-
The buyer receives instructions when the process is not obvious.
Etsy does not currently support variations for digital listings. It also does not allow an instant-download listing to be saved or published without an attached file.
Step 10: Set Shipping, Processing, Returns, and Disclosures
The operational side of how to create an Etsy listing matters as much as the photos. This step is where a polished-looking listing can still fail. A beautiful product page does not help if the delivery promise is impossible, the package weight is wrong, or the listing hides how the item was made.
Physical item: create or apply a processing profile
A processing time is the time you need to prepare the order before giving it to the shipping carrier. It is not the same as transit time.
In the current Etsy listing form:
- Go to Processing profile.
- Choose Create or select an existing accurate profile.
- Choose Made to order or Ready to ship.
- Select the processing time you can consistently meet.
- Apply the profile.
Etsy uses the processing time with shipping information to provide an estimated delivery date. Choose a time based on your normal workload, drying or production time, personalization, quality checks, and packaging.
Do not promise one-day processing because it looks attractive if you can meet it only on a quiet week. Late shipping can create buyer frustration and order problems.
Physical item: set the shipping option
Choose an existing shipping profile or create one. For calculated shipping, enter the weight and dimensions of the packed parcel.
Confirm:
- Shipping origin postal code
- Domestic service
- International service, when offered
- Package weight
- Package length, width, and height
- Handling or processing profile
- Shipping upgrades, when offered
- Countries you are prepared and legally able to serve
- Tariff or customs information, when applicable
Etsy currently requires enough information to provide an estimated delivery date when you save a physical listing or shipping profile.
If you sell to the European Economic Area or Northern Ireland as a trader, manufacturer and safety information may be required under the General Product Safety Regulation. International product, tax, customs, and consumer rules can be complex, so check the current Etsy guidance and the laws that apply to your product and buyers.
Physical item: apply a return and exchange policy
Etsy requires a return policy when you create or edit a physical listing, even when the policy says you do not accept returns or exchanges. Choose a policy you can honor and make sure the listing description does not contradict it.
Consider:
- Whether returns are accepted
- Whether exchanges are accepted
- The return window
- Who pays return shipping
- The condition required for a return
- Exceptions for personalized, custom, perishable, intimate, or regulated goods
- Rights that buyers may have under applicable law
A no-return setting does not erase consumer rights or excuse an item that arrives damaged, late, or materially different from the description.
Digital item: explain delivery and limits
Instant downloads do not use physical shipping or processing profiles. Etsy makes the uploaded files available after purchase.
For made-to-order digital work, explain:
- What the buyer submits
- How she submits it
- How many revisions are included
- The delivery time
- The final file types
- Whether editable source files are included
- What happens when information is incomplete
Do not create a digital listing that appears to sell a physical product. Place “digital product” or similar clear wording in the title, first image, and opening description when confusion is possible.
Complete the “How it is made” section honestly
State who made or designed the item, what the item is, and when it was made. Add every required production partner.
A production partner is not the same as a supply vendor. A company that prints your original design on a shirt or manufactures your designed product may be a production partner. A store that sold you blank shirts, clay, paper, or beads is generally a supplier.
Add an AI disclosure when required
Etsy’s current Seller Policy says that if an item is created through artificial intelligence, the seller must disclose that use in the relevant listing. Put the disclosure where a buyer can see it, using plain language that accurately describes the role of the tool and your own contribution.
Do not present an AI-generated image as a photograph of a physical finished item. Do not use AI to imitate a living artist, copy protected characters, or create misleading product features.
Choose the listing settings
Review:
- Shop section: Place the item in the correct section of your shop.
- Feature this listing: Turn this on only when you want the item at the top of your shop.
- Renewal: Choose automatic or manual renewal.
Automatic renewal makes sense for a repeatable product you expect to keep selling. Manual renewal may make more sense for a one-of-a-kind product, seasonal item, or listing you want to review before paying another fee at the end of the four-month period.
Screenshot suggestion: Add a current screenshot of the shipping, processing, and return-policy area. Use a sample listing and remove any address, customer, payment, or private shop data.
Step 11: Preview and Publish Your First Etsy Listing
This is the final stage of how to create an Etsy listing, but do not treat the Publish button as the finish line. First, review the page like a buyer who knows nothing about your product.
Run a pre-publish buyer test
- Select Preview when the option is available.
- Look at the main thumbnail at a small size.
- Read only the title and first two description lines. Confirm that you can identify the item.
- Open every image and inspect it for blur, accidental crops, or misleading props.
- Check the selected category.
- Test every variation and confirm its price, quantity, and photo.
- Read the personalization directions as though you were entering an order.
- Confirm the shipping cost and estimated delivery information.
- Confirm the return and exchange policy.
- Verify the production-partner and AI disclosures.
- For a digital item, confirm the file list and filenames.
- Check spelling, measurements, materials, and care instructions.
- Save as a draft when any fact remains uncertain.
Then publish.
Etsy charges the $0.20 listing fee when a standard listing is published. The item becomes live in your shop, but Etsy says it may take up to 48 hours to appear in search results and categories.
Check the live listing immediately
Open the public listing, preferably in a private browser window or while signed out. Review the page on both desktop and mobile.
Without completing a purchase, test the buyer path:
- Select each variation
- Enter sample personalization
- Add the item to the cart
- Review the displayed price
- Review the shipping cost and estimated delivery
- Remove the item from the cart
For a digital item, you cannot fully test the post-purchase download without an actual transaction. You can still verify the file names, description, image labels, and purchase expectations before publishing.
Record the launch information
Keep a simple listing log:
| Field | What to record |
| Listing name | Your internal product name |
| Listing URL | The live Etsy link |
| Date published | The original publish date |
| Initial title | Important because the first title helps form the listing URL |
| Initial tags | All 13 starting tags |
| Price | Base price and variation prices |
| Processing profile | The profile applied |
| Renewal | Automatic or manual |
| Next review date | A date to review performance and accuracy |
Etsy allows you to edit listing details later without an editing fee. However, the listing URL is based on the title used when the listing was first published and does not change when you later edit the title.
What to Do After the Listing Is Live
Knowing how to create an Etsy listing also means checking it after publication. Give Etsy time to place the new listing in search before deciding that it failed. Since Etsy says the process can take up to 48 hours, repeated title and tag changes during that window make it harder to know what was actually indexed.
During the first 48 hours
- Check that the listing remains active.
- Correct factual errors immediately.
- Confirm that every image loads.
- Recheck the mobile crop.
- Confirm the price and variations.
- Make sure the item appears in the correct shop section.
- Share the direct link through appropriate channels.
- Do not buy fake favorites, clicks, reviews, or orders.
After the listing starts receiving data
Use Shop Manager > Stats to review traffic and shopper behavior. Etsy Stats can show where visits come from and how shoppers engage with listings.
Look for useful patterns:
- Search terms that brought relevant visitors
- Views without favorites or purchases
- Favorites without purchases
- Questions buyers ask repeatedly
- A variation buyers try to select but cannot
- Shipping cost that surprises shoppers
- A photo buyers misunderstand
- A search term that attracts the wrong audience
Change one major element at a time when possible. If you replace the title, every tag, the first photo, and the price on the same day, you will not know which change helped or hurt.
Build a repeatable listing system
Once this listing is correct, turn your preparation document and final checklist into a template. For a similar product, use Etsy’s copy-listing feature, then review every copied field.
Never assume copied information is still accurate. A copied listing can carry over the wrong:
- Photo
- Price
- SKU
- Quantity
- Material
- Size
- Personalization text
- Processing profile
- Shipping profile
- Return policy
- Production partner
- Digital file
A template saves time only when you still perform a product-specific review.
Common Etsy Listing Mistakes
The original listing form is not difficult. Most problems come from rushing, guessing, or reusing information that does not fit the item.
1. Publishing an item that does not meet Etsy’s rules
A product can look suitable for Etsy and still violate the Creativity Standards, prohibited-items rules, or intellectual property policy. Verify eligibility first.
2. Using a supplier’s or another seller’s photos
A copied image can misrepresent the product and violate Etsy’s current seller rules. Photograph the item yourself unless your situation fits a documented exception.
3. Making the first photo decorative instead of clear
A beautiful lifestyle photo is not useful when the product is tiny, partly hidden, or cropped out of the thumbnail. Make identification the first goal.
4. Hiding the scale
A close-up can make a two-inch object look like a twelve-inch object. Include dimensions and a visual size reference.
5. Writing a keyword pile instead of a title
Repeated “gift for her” phrases do not help a shopper understand the item. State the product once, then add the few objective details that matter most.
6. Using a vague description
“Handmade with love” does not tell the buyer the size, material, included pieces, care instructions, delivery timing, or limitations. Specific details reduce uncertainty.
7. Underpricing labor and fees
Materials are only one cost. Count labor, packaging, overhead, payment fees, transaction fees, renewal fees, shipping, and possible ad fees.
8. Entering the wrong variation price
Etsy variation prices are total prices, not add-on amounts. Test every option before publishing.
9. Setting an unrealistic quantity
A made-to-order quantity of 100 may create a serious problem when several orders arrive and each requires two hours of work. Match quantity and processing time to real capacity.
10. Guessing the packed shipping weight
The box, padding, tissue, card, and label all add weight and size. Pack and measure a test order.
11. Confusing processing time with delivery time
Processing is your preparation time. Transit begins after the carrier receives the package.
12. Forgetting a required disclosure
Disclose production partners and AI use when required. Describe how the item was made accurately.
13. Uploading untested digital files
A broken ZIP file or missing font can create immediate customer-service work. Open and test the exact files you upload.
14. Using trademarked names to attract traffic
A popular brand or character name can create an infringement problem even when the physical product is handmade. Use only terms you have the right to use.
15. Promising a return policy you cannot honor
The description, selected Etsy policy, shop policy, and customer messages should not contradict each other.
16. Editing everything before the listing reaches search
Correct mistakes immediately, but give accurate listings time to enter Etsy search. Etsy says that can take up to 48 hours.
17. Assuming one listing will prove the entire business
One product page can teach you the process, but it may not provide enough inventory, variety, or data to evaluate a shop. Build a focused group of products that serve the same buyer rather than listing random items.
Final Etsy Listing Quality Checklist
Product and policy eligibility
-
The item fits Etsy’s current Creativity Standards.
-
The item is not prohibited or improperly resold.
-
I own or have the necessary commercial rights to every design element.
-
I am not using protected names, characters, logos, or artwork without permission.
-
I have saved licenses and proof of purchase for outside assets.
-
My production partner is disclosed when required.
-
My use of artificial intelligence is disclosed when required.
-
The listing accurately states who made or designed the item.
Photos and video
-
The first image clearly shows the exact item.
-
The product remains visible in different thumbnail crops.
-
The images are sharp, well lit, and color accurate.
-
I used my own photos or a permitted exception.
-
I showed important angles, details, scale, and variations.
-
Props that are not included cannot be mistaken for part of the purchase.
-
Digital-product images clearly state that no physical item is shipped.
-
Every image has accurate, descriptive alt text.
-
The video makes sense without audio.
-
I did not edit the product in a misleading way.
Title, description, and search details
-
The title begins with a clear product name.
-
The title uses objective details and reads naturally.
-
The first description sentence identifies the item.
-
The description states exactly what is included.
-
Dimensions, capacity, materials, colors, and care details are accurate.
-
The listing states what is not included when needed.
-
All relevant category attributes are completed.
-
I used up to 13 relevant, varied tags.
-
My tags describe this exact product.
-
I removed unsupported claims and unnecessary repetition.
Price and inventory
-
The price covers materials, labor, packaging, overhead, fees, and profit.
-
I considered the effect of possible Offsite Ads fees.
-
Every variation shows the correct total price.
-
The quantity reflects actual inventory or production capacity.
-
The SKU matches my internal records.
-
I understand the listing’s renewal setting.
Physical-product fulfillment
-
The processing time is realistic.
-
The package was weighed after packing.
-
The packed dimensions are correct.
-
The shipping origin and services are accurate.
-
Etsy can display an estimated delivery date.
-
The return and exchange policy is selected and accurate.
-
Customs, tariff, safety, or GPSR information is handled when applicable.
Digital-product delivery
-
All files open correctly.
-
File sizes meet Etsy’s limit.
-
Filenames are professional and buyer friendly.
-
The buyer receives clear access or use instructions.
-
Required software, account access, and skill level are disclosed.
-
File sizes, page sizes, ratios, and formats are listed.
-
License terms are clear.
-
The listing does not imply that a physical product will arrive.
Final publication check
-
I previewed the listing.
-
I tested all variations and personalization fields.
-
I reviewed the public listing on desktop and mobile.
-
The price, shipping, and estimated delivery display correctly.
-
The live listing appears in the correct shop section.
-
I recorded the URL, initial title, tags, price, and publish date.
-
I set a date to review the listing after it has collected useful data.
Frequently Asked Questions
How much does it cost to publish the first Etsy listing?
Etsy currently charges a $0.20 USD listing fee when a standard listing is published, whether or not it sells. A new shop may also have a one-time, nonrefundable setup fee that varies by location and is displayed during onboarding.
When a U.S. seller makes a sale through Etsy Payments, the baseline fees also include Etsy’s 6.5% transaction fee and the U.S. processing fee of 3% plus $0.25 per order. Shipping labels, optional ads, Offsite Ads, currency conversion, taxes, and other location-specific charges may add to the total.
How many photos can I add to an Etsy listing?
Etsy’s current listing form allows up to 20 photos and two videos. You do not need to use every slot, but you should show the item clearly, include scale, show important details, and explain variations.
Etsy recommends listing photos with a width and height of at least 2,000 pixels. The first image should keep the main subject near the center so it remains clear in different thumbnail crops.
How many tags should I use?
Etsy allows up to 13 tags and recommends using all available tags when you have relevant phrases. Use natural multiword phrases with variety rather than repeating the same keyword in slightly different forms.
Attributes, categories, titles, descriptions, photos, and shopper behavior also contribute information. Tags are important, but they cannot rescue an unclear or unwanted product.
Do I need a paid keyword tool?
No. You can create and publish a sound first listing with Etsy’s search suggestions, accurate product language, and the free information in Shop Stats after the listing receives traffic.
A paid tool may help organize research later, but it does not guarantee ranking or sales. Do not let a subscription delay a complete, accurate listing.
Can I edit an Etsy listing after publishing it?
Yes. Etsy says you can edit all parts of a listing, and there is no fee for editing. Publishing or renewing the listing does carry the listing fee.
The listing URL is based on the title entered when it was first published. Editing the title later does not change that URL.
How long does it take a new Etsy listing to appear in search?
Etsy says a published listing may take up to 48 hours to appear in search results and categories. The listing can already be live in your shop during that time.
Correct factual errors immediately, but do not assume a listing has failed because it does not appear in search within a few minutes.
Can I use variations for a digital Etsy listing?
No. Etsy does not currently support variations for digital listings.
You can include several clearly described files in one bundle, create separate listings, or use the made-to-order digital option when it accurately fits the product. Do not use variation language in the description that the buyer cannot actually select at checkout.
How many digital files can I upload?
An instant digital listing can currently include up to five files, with a maximum size of 20 MB per file. Etsy supports several common file types, including PDF, JPG, PNG, ZIP, EPUB, and others listed in its official digital-listing help page.
The buyer sees the uploaded filenames, so rename and test every file before upload.
Can I sell AI-generated artwork on Etsy?
Etsy’s Creativity Standards currently include seller-prompted AI creations within the designed-by-seller category, but Etsy requires the seller to disclose AI use in the listing description. The work must also comply with Etsy’s other policies and applicable intellectual property law.
Using an AI tool does not give you the right to copy a protected character, logo, artist’s work, or another seller’s product. It also does not make a misleading product image acceptable.
Can I use a print-on-demand company?
A print-on-demand company may qualify as a production partner when it produces a physical item from your original design. Etsy requires the production partner to be disclosed in the relevant listings, and the product must meet its Creativity Standards.
Reselling a generic item that you did not design does not become allowed simply because another company ships it for you.
What should I do if Etsy removes the listing?
Check the email address connected to the shop, including spam and junk folders. Etsy says its notice should explain why the listing was removed.
Review the applicable policy before creating a replacement. Reposting the same noncompliant item can lead to further enforcement, and Etsy’s standard listing fees are generally nonrefundable.
Should I publish one product or wait until the entire shop is ready?
Publish only when the listing itself is accurate and the basic shop information needed for a buyer is ready. You do not need dozens of products before learning the process, but one isolated listing usually offers limited selection and limited data.
Use the first listing to build your system, then create a focused set of related products for the same customer. That is more useful than filling the shop with unrelated items simply to increase the count.
A Final Word From WAHMN
Your first listing does not need to be flashy. It needs to be true, complete, easy to understand, and financially workable.
When you learn how to create an Etsy listing with a repeatable process, the second listing becomes faster because you are no longer starting from a blank screen. Keep the preparation folder, pricing worksheet, photo shot list, description structure, and quality checklist. Improve them as real buyer questions and Etsy Stats show you where the listing still needs work.
Official Etsy Sources Used for This Guide
All links below are normal editorial links to Etsy’s current help pages and policies.
- How to Create a Listing
- Etsy Fee Basics
- Fees and Payments Policy
- Payment Processing Fees by Country
- How Etsy Offsite Ads Work
- Requirements and Best Practices for Shop Images
- How to Add Listing Videos
- SEO for Shop and Listing Pages
- What Can I Sell on Etsy?
- Etsy Creativity Standards
- Etsy Seller Policy
- Etsy Intellectual Property Policy
- Working With Production Partners
- How to Add Variations
- How to Manage Digital Listings
- How to Set Processing Times and Ship-By Dates
- How to Set Return Policies
Keep reading on WAHMN
More articles in this category, browse the full article library, or explore our business tools and learning paths.
Good listings still need visitors. Pinterest Profits covers where most Etsy traffic comes from, and Print on Demand Business covers selling products you never have to post yourself.