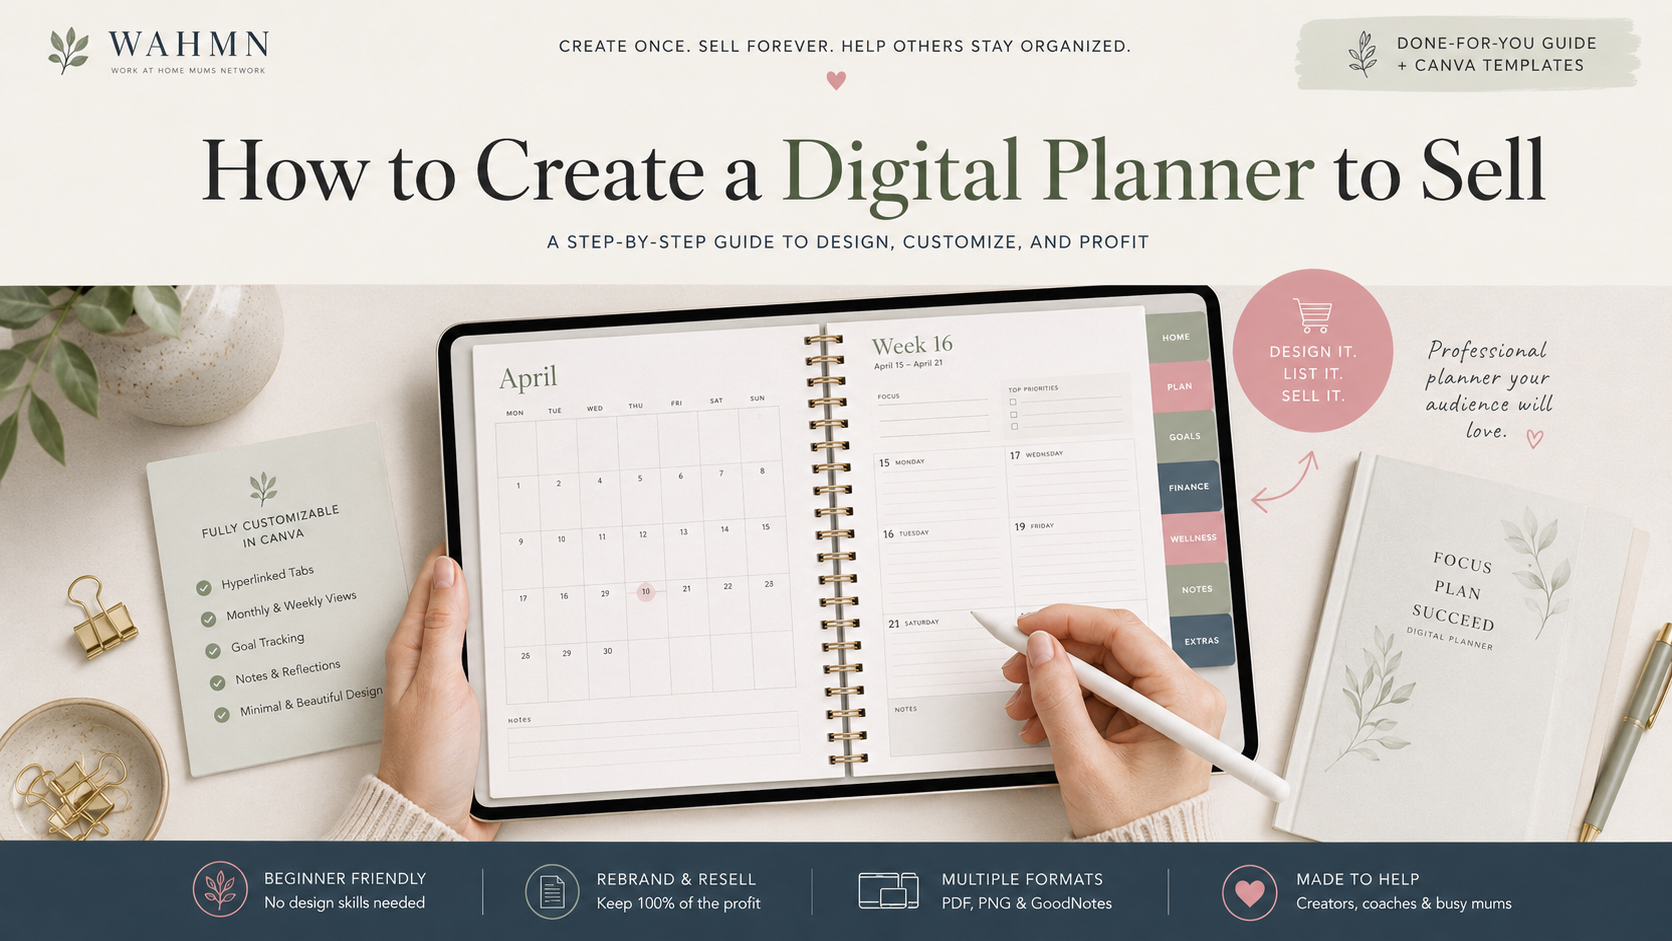
How to Create a Digital Planner to Sell
In this article
- Define Your Digital Planner Idea and Ideal Buyer
- Plan the Pages, Features, and File Formats
- Create Your Digital Planner to Sell with Canva
- Design Planner Pages That Customers Will Enjoy Using
- Add Navigation, Hyperlinks, and Helpful User Instructions
- Prepare, Package, and Test the Finished Product
- Price Your Digital Planner and Choose a Sales Channel
- Create High-Converting Product Images and Sales Materials
- Market Your Planner and Reach Your First Buyers
- Improve Sales and Grow Your Digital Product Business
- FAQ
Starting an online business from your home has never been more accessible. Many creative entrepreneurs are finding success by designing functional tools that help people stay organized. Learning how to create a digital planner to sell is a fantastic way to build a sustainable income stream while expressing your unique style.
You do not need advanced coding skills or expensive software to get started. This guide breaks down the entire journey into simple, actionable steps. We will cover everything from choosing your target niche and designing beautiful layouts to reaching your first customers on platforms like Etsy.
Whether you are a seasoned designer or a complete beginner, these strategies will help you launch your product with confidence. By following this roadmap, you can turn your passion for organization into a profitable side hustle. Let’s dive into the process of building your brand and reaching your audience in the United States market.
Key Takeaways
- Identify a specific niche to attract dedicated buyers.
- Use accessible design tools to build professional layouts.
- Focus on user experience to ensure high customer satisfaction.
- Leverage popular marketplaces to gain immediate visibility.
- Implement effective marketing strategies to grow your business.
Define Your Digital Planner Idea and Ideal Buyer
Success in the digital planner market begins long before you open your design software. Learning how to create a digital planner to sell requires a strategic mindset that prioritizes the needs of your future customers over personal design preferences.
Choose a Specific Planner Niche
Selecting the right digital planner niche is the foundation of your business. Instead of creating a generic planner for everyone, focus on a specific group of people with unique requirements.
Narrowing your focus helps you stand out in a crowded marketplace. When you solve a specific problem for a small group, you build authority and trust much faster than by offering a broad, one-size-fits-all product.
Identify the Buyer’s Goals, Problems, and Buying Motivation
To attract your ideal digital planner buyer, you must understand what keeps them up at night. Are they busy professionals struggling with time management, or students trying to organize their academic schedules?
Your product should act as a bridge between their current frustration and their desired outcome. When you identify their core motivation, whether it is reducing stress, increasing productivity, or tracking health goals, you can tailor your features to meet those specific needs.
Decide Between a Dated, Undated, or Specialized Planner
The format of your planner dictates how customers interact with your files. Dated planners offer convenience but require annual updates, while undated planners provide evergreen value that customers can start using at any time of the year.
Specialized planners, such as those for fitness, budgeting, or meal planning, often command higher prices because they offer deep, focused utility. Consider your long-term maintenance goals when choosing between these formats.
Popular Planner Niches for U.S. Customers
| Niche Category | Primary User | Key Feature |
|---|---|---|
| Academic | College Students | Semester Overviews |
| Financial | Budget-Conscious Families | Debt Tracker |
| Wellness | Health Enthusiasts | Habit Tracker |
How to Validate Demand Before Designing
Effective planner product research prevents you from spending hours on a design that nobody wants. Start by searching for your niche on platforms like Etsy or Pinterest to see what is currently trending.
Look for gaps in existing products by reading customer reviews. If many users complain about a lack of specific pages or poor navigation, you have found a perfect opportunity to create a better, more user-friendly version.
Plan the Pages, Features, and File Formats
Transforming your planner concept into a functional product requires careful structural planning. By organizing your digital planner pages before you begin designing, you ensure a smooth experience for your future customers.
Map the Planner’s Core Pages and User Journey
Start by sketching a rough outline of the user journey. Think about how a person moves from their daily schedule to their long-term goals. A logical flow helps users find what they need without feeling overwhelmed by too many options.
Include Useful Calendar, Goal-Setting, and Tracking Pages
Most successful planners include a mix of structural and functional pages. You should prioritize a yearly overview, monthly spreads, and weekly planning views. Adding specific trackers for habits, finances, or fitness can significantly increase the perceived value of your product.
Choose Hyperlinks, Writing Areas, and Reusable Templates
A hyperlinked planner PDF acts as the backbone of your digital product. By creating clickable tabs, you allow users to jump between sections instantly. Ensure your writing areas are spacious enough for stylus input, and include blank templates that users can duplicate as needed.
| File Format | Primary Use | Best For |
|---|---|---|
| Main Planner File | Hyperlinked Navigation | |
| PNG | Stickers/Icons | Transparent Overlays |
| JPG | Cover Art | High-Quality Previews |
PDF, PNG, and Other Digital Planner File Options
Understanding digital planner file formats is essential for compatibility. While PDF is the industry standard for planners, PNG files are perfect for digital stickers. Providing a variety of formats ensures your customers have the tools they need to customize their experience.
How to Keep the Product Easy to Use on Tablets
Effective tablet planner design focuses on simplicity and touch-friendly elements. Keep your navigation buttons large enough to tap easily with a finger or stylus. Testing your layout on different screen sizes will help you avoid common usability issues before you launch.
Create Your Digital Planner to Sell with Canva
Transforming your creative vision into a functional digital planner starts with a solid foundation in Canva. By leveraging this platform, you can produce professional-grade files that appeal to your target audience while maintaining a streamlined workflow.
Set Up the Canva Document With the Correct Dimensions
Before you begin, you must establish the right canvas size. Most users prefer standard letter size (8.5 x 11 inches) or A4, as these are easy to print if the customer chooses to do so. Consistency is key to a professional look, so ensure your document settings remain identical across every page of your project.
Build a Consistent Color Palette, Font Pairing, and Layout
A cohesive Canva planner design relies on a limited set of visual rules. Select a primary color palette of three to five colors and stick to them throughout the document. Pair a clean, readable font for body text with a more decorative font for headers to create visual interest without sacrificing clarity.
Design the Cover, Divider Pages, and Repeating Templates
Your cover acts as the storefront for your product, so it needs to be visually striking. Use divider pages to separate months or sections, which helps the user navigate their planner easily. Creating repeating templates for daily or weekly views ensures that your Canva planner design remains uniform and professional.
Canva Ebook Creation Techniques for Planner Covers and Guides
When you learn how to create an ebook in Canva to sell, you gain skills that apply directly to planner covers. Use high-quality imagery and bold typography to grab attention immediately. This step-by-step guide for ebook creation in Canva suggests using frames and grids to keep your layout balanced and clean.
Ebook Design in Canva Tips for Readability and Visual Hierarchy
Effective ebook design in Canva requires a clear hierarchy. Place your most important information at the top of the page and use white space to prevent the layout from feeling cluttered.
“Design is not just what it looks like and feels like. Design is how it works.”, Steve Jobs
| Element | Purpose | Design Tip |
|---|---|---|
| Cover Page | First Impression | Use bold, clear titles |
| Divider Pages | Organization | Use high-contrast colors |
| Daily Templates | Functionality | Keep writing areas open |
Use Canva’s Elements Without Creating Licensing Problems
Understanding Canva licensing for digital products is vital for your business success. Always check if an element is marked as “Free” or “Pro” and ensure you are not using stock graphics in a way that violates their terms. For the best results, consider using your own custom illustrations or elements that are explicitly allowed for commercial use in Canva ebook creation.
Design Planner Pages That Customers Will Enjoy Using
Your digital planner layout serves as the foundation for a productive user experience. When users open your file, they should immediately understand how to navigate their tasks and goals. A clean, intuitive structure prevents frustration and encourages consistent use.
Create Clear Daily, Weekly, and Monthly Planning Layouts
A high-quality daily weekly monthly planner must offer enough structure to guide the user without being overly restrictive. Use consistent grid systems to align your text boxes and headers across every page. This consistency helps the user build a habit of planning because they know exactly where to look for their schedule.
- Use a monthly overview for long-term goal tracking.
- Provide a weekly spread to manage recurring appointments.
- Include a daily page with dedicated sections for top priorities and notes.
Balance Decorative Details With Writing Space
While beautiful graphics attract buyers, functionality remains the top priority for long-term satisfaction. You should reserve the majority of the page for actual writing or typing. Decorative elements like floral borders or watercolor accents should frame the content rather than clutter it.
Try to keep your background designs subtle. If a page is too busy, the user will struggle to read their own handwriting or see their typed text clearly. Minimalist designs often perform best because they allow the user to customize the page with their own stickers and highlighters.
Make the Planner Accessible and Comfortable to Read
An accessible planner design ensures that everyone can use your product comfortably, regardless of their visual preferences. High contrast between text and background is essential for readability. Avoid using light gray fonts on white backgrounds, as these can be difficult to see on tablet screens.
Color Contrast, Font Size, and Printable Design Considerations
When you create a printable planner design, you must account for ink usage and paper margins. Use a font size of at least 10pt to 12pt for body text to ensure it remains legible after printing. Strong contrast is vital here, so stick to dark charcoal or black text for the best results.
| Feature | Digital Use | Printable Use |
|---|---|---|
| Font Size | 10pt – 14pt | 12pt – 16pt |
| Color Palette | RGB (Vibrant) | CMYK (Muted) |
| Margins | Minimal | 0.5 inch minimum |
How to Design for GoodNotes, Noteshelf, and Other Tablet Apps
Designing a GoodNotes digital planner requires specific technical considerations to ensure a smooth experience. You should export your files as high-resolution PDFs to maintain crisp lines when the user zooms in. Always test your templates in popular apps like Noteshelf or Notability to verify that the writing areas are large enough for a stylus.
Pro tip: Ensure your page templates are perfectly aligned so that when a user duplicates a page, it stays in the exact same position. This prevents the “jumping” effect that can occur during navigation. By focusing on these technical details, you create a professional product that customers will rely on daily.
Add Navigation, Hyperlinks, and Helpful User Instructions
Mastering the art of internal linking is the secret to creating a professional-grade hyperlinked digital planner. When users open your file, they expect to jump between months, weeks, and daily logs with a single tap. Providing this level of efficiency transforms a simple document into a powerful productivity tool.
Build Tabs and Internal Links for Fast Navigation
To create effective digital planner navigation, you must design visual tabs along the edges of your pages. These tabs act as a persistent menu that remains visible regardless of which page the user is currently viewing. You can link these shapes directly to specific pages within your document to ensure a smooth user journey.
Consistency is key when setting up these links. Ensure that every tab leads to the correct section header or monthly overview. By keeping your link structure logical, you help users feel confident and in control of their planning process.
Test Links, Page Order, and Interactive Elements
Before you finalize your product, you must verify that every link functions as intended. Click through every single tab and button to ensure they land on the correct page. A broken link can lead to immediate frustration and negative reviews from your customers.
Pay close attention to the page order during your testing phase. If you add or remove pages, your internal links might shift, causing them to point to the wrong destination. Regular testing is the best way to maintain a high-quality user experience.
Include a Getting-Started Page and App Compatibility Notes
New users often feel overwhelmed when they first open a digital file. Including a dedicated “Getting Started” page helps bridge the gap between purchase and productivity. This page should provide clear interactive planner instructions that explain how to use the hyperlinks and navigate the interface.
You should also list the apps that are compatible with your file, such as GoodNotes, Notability, or Penly. Clearly stating these requirements helps customers understand exactly what they need to get the most out of their purchase.
How to Export a Functional Hyperlinked PDF From Canva
Creating a Canva hyperlinked PDF is a straightforward process once you know the steps. After you have finished your design and added all your links, click the “Share” button in the top right corner. Select “Download” and choose “PDF Standard” as your file type.
Ensure that the “Include links” box is checked before you hit the download button. This step is crucial, as it preserves the interactive nature of your document. Without this setting, your file will remain a static image without any clickable functionality.
Common Navigation Errors to Fix Before Selling
Even experienced designers sometimes overlook small details that affect usability. One common mistake is placing links too close to the edge of the page, which can make them difficult to tap on a tablet. Another error is failing to update links after rearranging the page order of your planner.
| Navigation Feature | Purpose | Best Practice |
|---|---|---|
| Side Tabs | Quick section access | Keep consistent on every page |
| Home Button | Return to index | Place in a fixed, easy-to-reach corner |
| Internal Links | Connect related pages | Test every link before exporting |
| Getting Started Page | User onboarding | Include app compatibility notes |
Prepare, Package, and Test the Finished Product
Preparing your files for sale is a critical phase that builds trust with your buyers. A polished, professional presentation ensures that your customers have a seamless experience from the moment they download their purchase.
Export the Final Digital Planner From Canva
When you are ready to share your work, you must export digital planner from Canva using the correct settings. Select the “PDF Standard” or “PDF Print” option to ensure the file size remains manageable for your customers while maintaining high visual quality.
Always flatten your document if possible to prevent elements from shifting. This simple step guarantees that your layout looks exactly as you intended on every device.
Organize the Download Folder and Name Every File Clearly
Effective digital product packaging involves creating a clean, intuitive folder structure for your buyers. Group your files into logical folders, such as “Planner Files,” “Instructional Guides,” and “Bonus Stickers.”
Use clear, descriptive filenames for every item. Avoid generic names like “File1.pdf” and instead use professional labels like “2024_Monthly_Planner_Landscape.pdf.” This helps your customers find exactly what they need without any confusion.
Check Quality on Multiple Devices and Screen Sizes
Before you list your product, test it on various devices to ensure the hyperlinks and layout function correctly. Open your planner on an iPad, an Android tablet, and a desktop computer to verify that the navigation remains smooth and responsive.
Use a Final Quality-Control Checklist
A digital planner quality checklist is your best tool for catching small errors before they reach the public. Use the following points to verify your work:
- Check that every hyperlink leads to the correct page.
- Verify that all fonts are embedded or converted to outlines.
- Ensure that the margins provide enough space for digital writing tools.
- Confirm that the file size is optimized for quick downloading.
Protect Customer Privacy and Avoid Including Unlicensed Content
Respecting intellectual property is essential for a sustainable business. Ensure that every element, font, and graphic you used is properly licensed for commercial use.
Double-check that no personal information or private templates remain in the final export. Protecting your brand reputation starts with providing clean, original content.
Create a Quick-Start Guide and Customer Support Instructions
Include a helpful customer support guide to assist users who may be new to digital planning. This document should explain how to import the file into apps like GoodNotes or Notability.
Provide clear contact information so buyers know how to reach you if they encounter technical issues. A proactive approach to support significantly reduces refund requests and encourages positive reviews.
Price Your Digital Planner and Choose a Sales Channel
Setting the right digital planner pricing is a critical step in turning your creative work into a profitable business. You want to ensure your price reflects the effort you invested while remaining attractive to your target audience.
Research Competitor Pricing and Define Your Product’s Value
Start by browsing marketplaces to see what similar products cost. Look for planners that share your specific niche and feature set to establish a baseline.
Consider the unique value you provide, such as custom templates or specialized tracking pages. Your pricing should reflect the time saved by the user rather than just the time you spent designing.
Set an Entry-Level, Standard, or Premium Price
Most creators use a tiered approach to capture different segments of the market. You might offer a simple, low-cost version to attract new customers, while reserving your most comprehensive, feature-rich planner for a premium price point.
- Entry-Level: Best for simple, single-purpose planners.
- Standard: The sweet spot for most full-featured planners.
- Premium: Includes extra bonuses, stickers, or video tutorials.
Compare Etsy, Shopify, Gumroad, and Other Selling Options
Choosing the right platform depends on your technical comfort and marketing goals. An Etsy digital planner shop offers built-in traffic, while Shopify digital products give you full control over your brand. A Gumroad planner setup is often the fastest way to start selling without complex website maintenance.
| Platform | Best For | Key Advantage |
|---|---|---|
| Etsy | Beginners | High buyer traffic |
| Shopify | Brand Builders | Total store control |
| Gumroad | Quick Launches | Simple setup |
Digital Delivery, Platform Fees, and U.S. Sales Tax Basics
When selling in the United States, you must account for digital product sales tax, which varies by state. Most platforms handle the technical delivery of files automatically, but you should verify how they manage tax collection for your specific region.
Always review the fee structure of your chosen platform. Some charge a flat monthly fee, while others take a percentage of every sale.
How to Create Product Bundles and Upsells
Increase your average order value by grouping related items together. You can even include guides on selling ebooks on Canva as a bonus to add extra value to your planner bundles.
Upselling is a powerful way to reward your most loyal customers. Offer a discounted add-on, such as a matching digital sticker pack, immediately after the initial purchase.
Write a Clear Product Description and Refund Policy
Your product description should clearly list exactly what the buyer receives. Use bullet points to highlight the number of pages, file formats, and compatibility with apps like GoodNotes.
Because digital files cannot be returned, a clear refund policy is essential. State your policy upfront to build trust and prevent misunderstandings with your customers.
Create High-Converting Product Images and Sales Materials
Turning a casual browser into a buyer starts with high-quality visual presentation. Since customers cannot physically touch your product, your marketing materials must bridge the gap between a digital file and a tangible experience. Effective visuals build trust and demonstrate exactly how your planner fits into a daily routine.
Design Planner Mockups That Show the Product in Use
Professional digital planner mockups are essential for showcasing your work. These images allow shoppers to visualize the planner on an iPad or tablet screen, making the product feel real and ready to use.
When creating your digital planner listing images, focus on lifestyle shots that show the planner in a clean, inviting workspace. You should include close-ups of specific pages to highlight the quality of your design and the clarity of your fonts.
Highlight the Number of Pages, Features, and Included Files
Shoppers want to know exactly what they are getting before they click the buy button. Use your listing images to provide a quick summary of the product specifications.
- Total Page Count: Clearly state how many pages are included.
- File Formats: List compatible apps like GoodNotes or Notability.
- Key Features: Mention hyperlinked tabs or custom stickers.
| Feature Category | What to Highlight | Why It Matters |
|---|---|---|
| Functionality | Hyperlinks & Tabs | Improves user navigation |
| Customization | Reusable Templates | Adds long-term value |
| Compatibility | App Support | Ensures customer success |
Write Listing Copy That Matches Buyer Search Intent
Your planner product description serves as the final sales pitch. To succeed, you must align your writing with buyer search intent by addressing the specific problems your planner solves for the user.
Use the Main Keyword and Related Search Terms Naturally
Avoid stuffing your text with repetitive phrases. Instead, weave terms like “how to create a digital planner to sell” or “digital organization tools” into sentences that explain the benefits of your specific layout.
How to Create an Ebook in Canva to Sell as a Planner Bonus
Adding extra value can significantly increase your conversion rate. You can learn how to create an ebook in Canva to sell as a planner bonus, such as a guide on time management or goal-setting tips.
This bonus content provides extra utility without requiring you to give away your core product. Keep the ebook focused on helpful advice that complements the planner’s structure.
Offer Preview Pages Without Giving Away the Entire Product
Providing a sneak peek helps customers feel confident in their purchase. Include a few high-resolution preview pages in your listing gallery to show off your design style.
Ensure these previews are watermarked or cropped to protect your intellectual property. By showing just enough, you create excitement and desire while keeping the full value of the planner exclusive to paying customers.
Market Your Planner and Reach Your First Buyers
Getting your digital planner in front of the right audience is the most exciting part of the creative journey. You have poured your heart into the design, and now it is time to connect with people who truly need your organizational tools.
Build a Launch Plan for Etsy, Shopify, or Your Chosen Store
A successful Etsy planner launch requires preparation before you even hit the publish button. Start by teasing your upcoming release on social media to build anticipation among your followers. Ensure your shop is fully optimized with clear policies and professional branding to make a great first impression.
Use Pinterest, Instagram, TikTok, and Email Marketing
Diversifying your reach across multiple platforms helps you find where your ideal customers spend their time. Consistency is key when you are building a brand from scratch. Consider these effective channels for your outreach:
- Pinterest planner marketing: Create aesthetic pins that link directly to your shop.
- Instagram: Share behind-the-scenes reels of your planner in action.
- TikTok: Post quick videos showing how your planner solves common productivity problems.
- Email Marketing: Send a welcome sequence to subscribers who want early access or exclusive discounts.
Publish Helpful Content That Demonstrates the Planner’s Benefits
Instead of relying on aggressive sales pitches, focus on providing value to your audience. When you show how your planner improves daily routines, you build trust with potential buyers. This approach to digital planner marketing turns casual observers into loyal customers.
Canva Ebook Marketing Ideas for Lead Magnets and Tutorials
You can use Canva ebook marketing to offer free mini-planners or goal-setting guides as lead magnets. These freebies allow potential customers to experience your design style before they commit to a purchase. Creating short, helpful tutorials also establishes your authority in the niche.
Canva Ebook Selling Tips for Product Promotions and Bundles
When it comes to Canva ebook selling tips, bundling is a powerful strategy to increase your average order value. Grouping your planner with matching stickers or specialized inserts makes the offer feel more valuable. Always highlight the specific benefits of these bundles to encourage higher conversion rates.
Collect Reviews and Turn Customer Feedback Into Social Proof
Your early buyers are your most valuable assets for long-term growth. Encourage them to leave honest reviews by providing excellent customer service and a seamless download experience. Displaying these testimonials prominently on your sales page provides the social proof needed to convince hesitant shoppers that your product is worth the investment.
Improve Sales and Grow Your Digital Product Business
Turning a single digital planner into a thriving business involves constant refinement and strategic expansion. Achieving long-term digital product business growth requires you to look beyond the initial launch and focus on how customers interact with your shop.
Track Views, Conversion Rates, Downloads, and Revenue
Monitoring your shop analytics provides the roadmap for your next steps. You should pay close attention to your planner conversion rate to understand how many visitors actually complete a purchase.
If your traffic is high but sales are low, your product images or pricing might need adjustment. Use the following table to track your monthly performance metrics:
| Metric | Goal | Action |
|---|---|---|
| Conversion Rate | Above 2% | Optimize listing copy |
| Monthly Revenue | Consistent Growth | Launch new products |
| Customer Feedback | High Ratings | Update planner features |
Update the Planner Based on Customer Questions and Feedback
Your customers are your best source of product development ideas. When users ask about specific features or report confusion, treat these messages as valuable insights for your next update.
Regularly refreshing your files keeps your shop relevant and encourages positive reviews. A simple update to include a new habit tracker or a better layout can significantly boost your brand reputation.
Create Related Products and Seasonal Planner Versions
Diversifying your catalog helps you capture different segments of your audience. Developing seasonal digital planners, such as holiday budget trackers or summer fitness journals, keeps your shop active throughout the year.
How to Create and Sell Ebooks With Canva Alongside Planners
You can easily create and sell ebooks with Canva to complement your existing planner offerings. For example, if you sell a meal planner, consider creating a short recipe ebook or a guide to healthy grocery shopping.
These digital assets provide extra value to your customers. They also establish your authority in your specific niche, making it easier to upsell your primary products.
Expand From One Planner Into a Complete Product Collection
Bundling individual items into a collection increases your average order value. By grouping a daily planner, a goal-setting workbook, and a matching ebook, you offer a comprehensive solution that feels like a premium experience.
Build Repeat Purchases Through Email Lists and Customer Relationships
The most successful shops focus on repeat digital product sales by staying connected with their audience. An email list allows you to announce new launches directly to people who already trust your brand.
Always provide helpful content in your emails rather than just sales pitches. When you nurture these relationships, your customers will return to your shop whenever they need a new tool for their daily routine.
Building a successful business requires a clear roadmap and a willingness to adapt. You now possess the essential knowledge on how to create a digital planner to sell to your target audience in the United States.
Success in this space relies on your ability to listen to your customers. Use their feedback and your sales data to refine your designs over time. Your first version serves as a starting point rather than a permanent product.
You have the tools to design, market, and grow your brand using platforms like Canva, Etsy, and Shopify. Take these steps to sell digital planners online with confidence. Every small update you make based on user needs helps you build a sustainable income stream.
Stay consistent with your marketing efforts and keep your creative process focused on solving real problems for your buyers. Your journey toward building a profitable digital product business begins with the very first page you design.
FAQ
How do I get started with Canva ebook creation for my digital planner business?
Is it difficult to learn how to create an ebook in Canva to sell?
What are the best Canva ebook selling tips for a new shop owner?
How can I effectively use Canva ebook marketing to reach more buyers?
Are there specific rules for selling ebooks on Canva or other digital marketplaces?
Can I create and sell ebooks with Canva if I only have a free account?
What is the most important step in the step-by-step guide for ebook creation in Canva?
Keep reading on WAHMN
More articles in this category, browse the full article library, or explore our business tools and learning paths.
Planners sell on being found. Pinterest Profits covers that traffic, and Business Launcher covers pricing and launching properly.